


How to Prepare an Older Home for a Fresh Coat of Paint
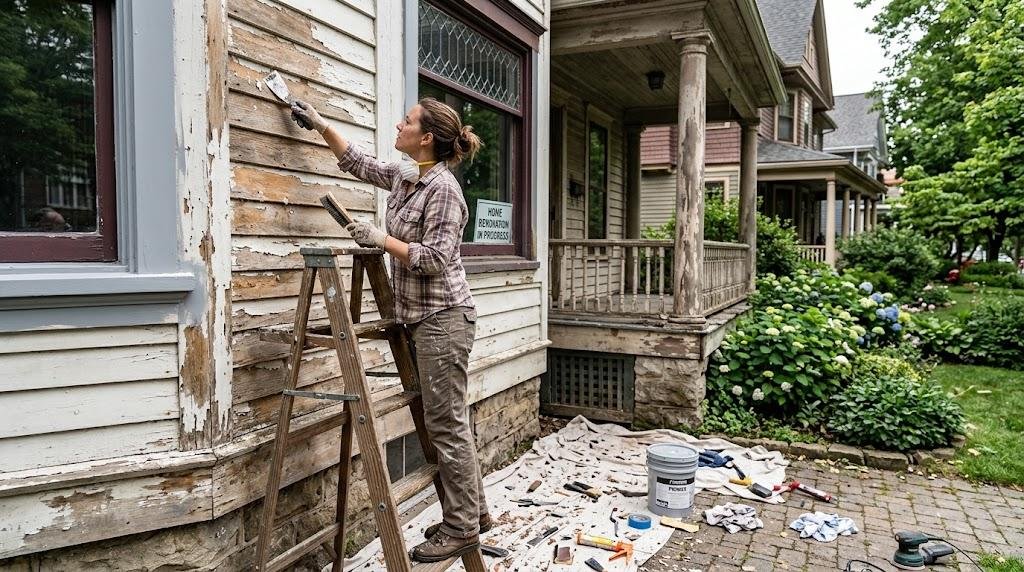
Painting an older home can completely change its appearance, but getting beautiful, long-lasting results takes more than choosing a new color and picking up a brush. Older houses often have years of wear, previous paint layers, small cracks, moisture damage, and uneven surfaces that need attention before fresh paint goes on. Proper preparation helps the new coating adhere better, look smoother, and last longer.
Before you start working on the walls, take a close look at the entire property. If the home has exterior areas near porches, stairs, railings, or decks, inspect those surfaces too. For example, if you notice damaged or deteriorating deck boards, arranging Deck Repair in Greenville before painting can prevent you from covering up problems that need to be addressed first. A fresh coat of paint should be the finishing step, not a way to hide structural or surface issues.
Start With a Thorough Inspection
The first step is to walk through the home and identify everything that could affect the painting project. Look at walls, ceilings, trim, doors, windows, siding, and other painted surfaces.
Pay attention to:
- Peeling or bubbling paint
- Hairline and larger cracks
- Nail holes and dents
- Water stains
- Soft or damaged wood
- Mold or mildew
- Grease and dirt buildup
- Loose caulk
- Areas where old paint is separating from the surface
Older homes can have several layers of paint, so don't assume the visible surface tells the whole story. Areas that look fine at first may reveal problems once cleaning or scraping begins.
If you find extensive water damage, rotten wood, or other significant deterioration, repair the underlying issue before painting.
Check for Moisture Problems
Moisture is one of the biggest enemies of a successful paint job. If water is getting into the walls or wood, applying new paint over the affected area usually won't solve the problem.
Look for stains around windows, ceilings, exterior walls, bathrooms, kitchens, and areas near plumbing. Outside, inspect gutters, downspouts, roof edges, siding, and areas where water may collect.
A damp wall can cause paint to blister, peel, discolor, or develop mold. Before moving forward, determine where the moisture is coming from and fix the source.
Give recently repaired or washed surfaces enough time to dry completely. Painting over damp materials can trap moisture underneath the new coating and create problems later.
Test Existing Paint Before Disturbing It
Older homes may contain paint applied many decades ago. Depending on the home's age and location, some older coatings may contain lead.
Do not aggressively sand or scrape an old painted surface until you understand what you're dealing with. If you're unsure about the age or composition of the existing paint, consider having it professionally tested.
If lead-based paint is present, follow appropriate safety and local regulations for containment, removal, and disposal. Children and pets should be kept away from areas where old paint is being disturbed.
This step may seem unnecessary, but identifying potentially hazardous coatings before preparation begins is much safer than discovering the problem halfway through the project.
Remove Loose and Peeling Paint
Once you've determined that the existing surface can be safely prepared, remove paint that is loose, flaking, or peeling.
Use the appropriate scraper or preparation method to remove unstable material without unnecessarily damaging the underlying surface. The goal isn't always to remove every layer of old paint. Instead, focus on creating a stable, sound surface for the new coating.
After scraping, examine the edges between old paint and exposed surfaces. Rough transitions can remain visible after painting, so feathering uneven edges may help create a smoother finish.
Avoid rushing this stage. Painting over loose material can cause the new paint to peel along with the old coating.
Repair Cracks, Holes, and Damaged Surfaces
Small imperfections become much more noticeable after a fresh coat of paint, especially when light hits the wall from an angle.
Fill appropriate nail holes, dents, and small cracks with a suitable patching compound. Once dry, sand the repaired areas carefully so they blend with the surrounding surface.
For wood trim and exterior surfaces, look for splits, rot, gaps, and deteriorated sections. Damaged wood may need repair or replacement rather than simply being painted.
Be especially careful around decks, stairs, and exterior structures. If wood has deteriorated beyond a simple cosmetic issue, a professional deck repair service in Valhalla may be more appropriate than attempting to conceal the damage with paint.
Remember that different problems require different repairs. A small nail hole is a cosmetic issue; recurring wall cracks, significant wood rot, or structural movement may require further investigation.
Clean the Surfaces Properly
Paint doesn't adhere well to surfaces covered in dust, grease, soot, or grime. Cleaning is therefore one of the most important preparation steps.
Interior walls can often be cleaned with a suitable mild cleaning solution and a clean sponge or cloth. Kitchens may require more attention because cooking can leave a thin layer of grease on walls and cabinets.
For exterior surfaces, accumulated dirt, mildew, pollen, and other contaminants should be removed using an appropriate cleaning method. Be careful with pressure washing older materials, as excessive pressure can damage wood, siding, mortar, or already weakened surfaces.
After cleaning, allow everything to dry completely before continuing.
Sand When Necessary
Sanding can help smooth rough areas and improve the transition between repaired spots and existing paint. It can also remove minor surface imperfections and create a more uniform surface.
However, more sanding isn't always better. Aggressive sanding can damage old surfaces and may create unnecessary dust, particularly when dealing with older coatings.
Use the least aggressive method that achieves the desired result, and follow appropriate safety precautions when working with older paint.
Replace Old Caulk
Old caulk around windows, doors, trim, and other joints can become brittle, cracked, or separated over time.
Remove deteriorated caulk where appropriate and replace it with a compatible product designed for the specific application. Fresh caulk can create cleaner lines while also helping seal small gaps where drafts or moisture might otherwise enter.
Allow new caulk to cure according to the manufacturer's instructions before painting.
Protect Floors, Fixtures, and Furniture
Preparation isn't limited to the walls. Protect everything that shouldn't receive paint.
Move furniture away from the work area whenever possible. Cover floors with appropriate drop cloths, and protect fixtures, hardware, countertops, and other surfaces.
Remove switch plates, outlet covers, and certain hardware where practical rather than trying to paint carefully around them. Label removed pieces if necessary so they can be returned to the correct locations.
Good protection saves cleanup time and helps produce sharper, more professional-looking results.
Use the Right Primer
Primer is particularly useful when working with an older home because surfaces may have stains, patched areas, different paint types, or exposed materials.
A quality primer can help create a more consistent base and improve adhesion. Choose a product based on the surface and the problem you're trying to address.
For example, stain-blocking primer may be appropriate for certain stains, while a suitable bonding primer can help when working with challenging surfaces. Bare wood, repaired drywall, and previously painted surfaces may each require different preparation.
Don't automatically assume one primer is suitable for every surface throughout the house.
Choose Paint Based on the Room and Surface
Once preparation is complete, select paint according to where it will be used.
Bathrooms and kitchens often benefit from coatings designed to handle moisture and frequent cleaning. High-traffic areas may need a durable finish that can tolerate regular contact. Exterior paint should be formulated for outdoor exposure and the particular material being coated.
Color matters, but performance matters too. Consider the existing condition of the surface, natural lighting, room usage, and how often the area will need cleaning.
Testing a small section can help you see how the color and finish actually look in the home's lighting before committing to the entire room.
Don't Rush the Preparation Stage
One of the most common mistakes when painting an older home is treating preparation as an inconvenience instead of part of the project.
It can be tempting to start painting as soon as you have your color selected. However, several hours spent cleaning, repairing, sanding, caulking, and priming can make a major difference in the final result.
Preparation also gives you an opportunity to discover problems before they become hidden behind fresh paint. If you find moisture damage, deteriorated wood, significant cracking, or other concerns, address them before applying the finish coat.
Conclusion
Preparing an older home for a fresh coat of paint requires patience, careful inspection, and attention to the condition of the existing surfaces. Start by identifying moisture and structural concerns, safely deal with old paint, repair damaged areas, clean thoroughly, sand where necessary, replace deteriorated caulk, and use the right primer before applying your new color. Taking these steps can help your paint job look cleaner and perform better for years. If you're planning a larger renovation or want professional guidance with the painting process, JLL Painting can be a useful option to consider when evaluating your project needs.
Frequently Asked Questions
1. Should I remove all the old paint before repainting an older home?
Not necessarily. If the existing paint is firmly attached and in good condition, it may not need complete removal. Loose, peeling, or damaged paint should be addressed before applying a new coating.
2. How do I know if an older wall needs primer?
Primer can be especially helpful when walls have stains, exposed surfaces, significant repairs, or inconsistent areas. It can also improve adhesion and create a more uniform base for the finish paint.
3. Can I paint over small cracks in an older home?
It's better to repair small cracks before painting. However, recurring or larger cracks may indicate an underlying issue that should be investigated rather than simply filled and painted over.
4. How long should I wait after washing walls before painting?
Walls should be completely dry before painting. The required drying time depends on humidity, ventilation, temperature, and how much water was used during cleaning. Never rely solely on a fixed number of hours; check that the surface is genuinely dry first.

 Arabic
 French
 Spanish
 Portuguese
 Deutsch
 Turkish
 Dutch
Dutch
 Italiano
 Russian
 Romaian
 Portuguese (Brazil)
 Greek
Greek